What is it and who is it available to?
Pipedrive understands that on many occasions, there are actions that you program continuously according to the status of your offers and negotiations. These actions, because they are repetitive, detract from the efficiency of your entire process. and even delays the timing of important tasks and can cause you to miss out on tasks that have a lot of value as well.
For these types of actions, Pipedrive offers Workflow Automation, a feature that allows you to mechanize your repetitive tasks so that you can give value and time to other actions that are also vital to your business.
You will find these automations divided into two types of events :
- Trigger event.
This is the event that triggers the series of actions to be performed and the reason why the next action is triggered and automated.
An example of this may be creating a new person contact. - Action event.
This is the “reaction” event that has been triggered after the activating event and is what you want to happen “if x happens first”.
Continuing with the example, if our activating action was to create a new person contact, the reaction event is to send him/her an introduction email.
If you have the Advanced, Professional and Corporate plans, you can already enjoy this feature. Remember that only administrator users and those with enabled permissions can create workflows.
How do I create an automation?
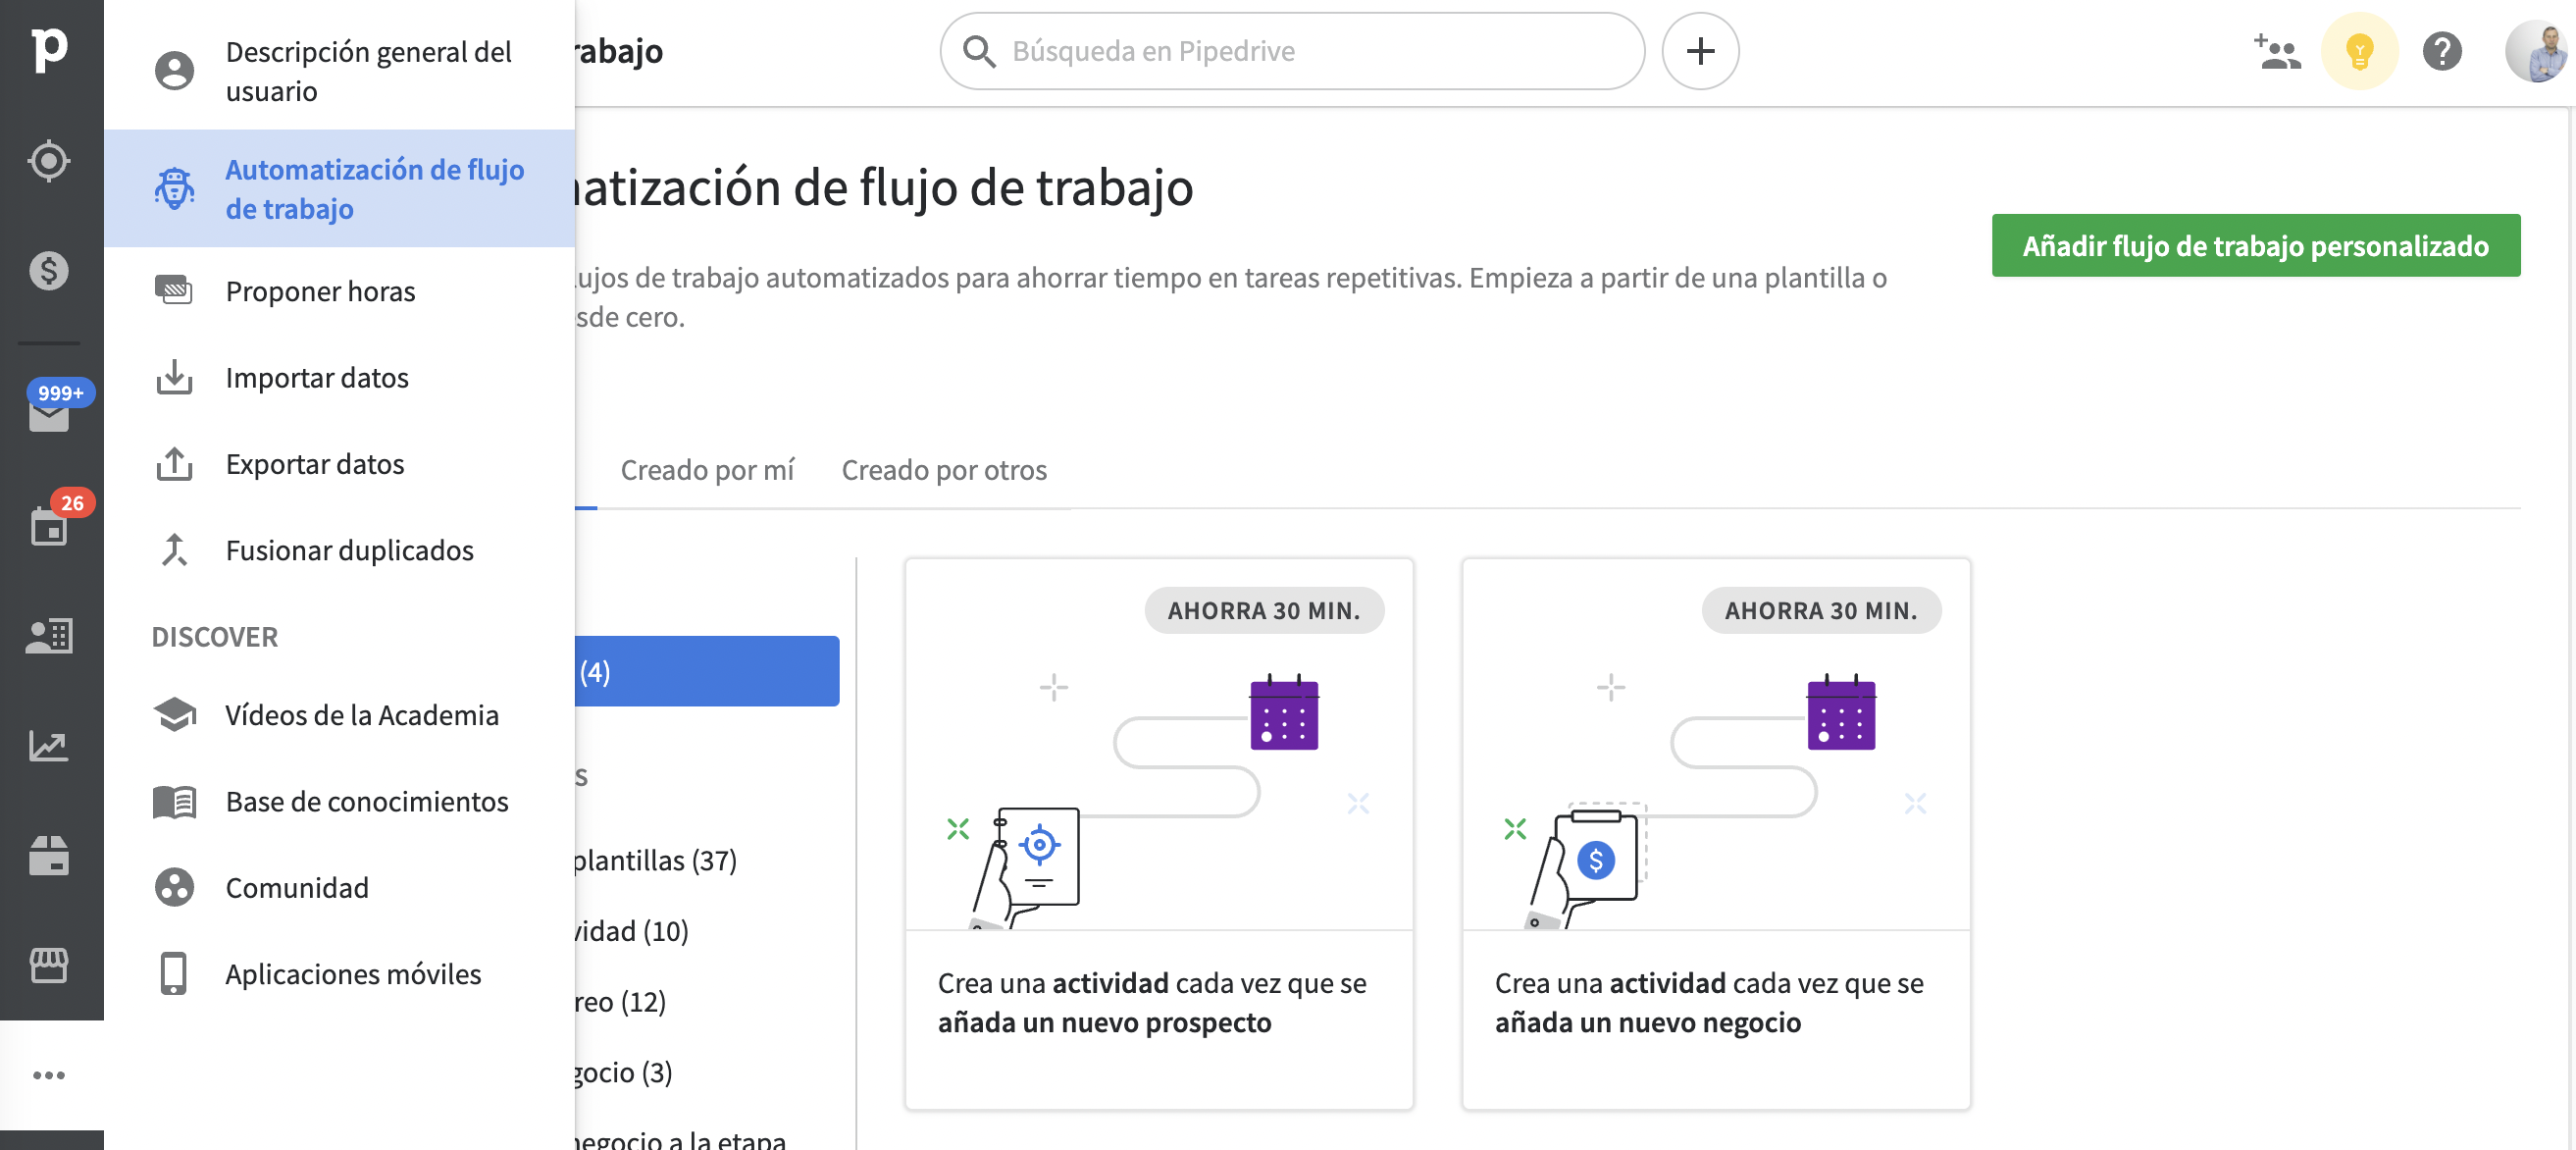
You must access by clicking on the “…” tab in the bottom left toolbar of your platform and then click on “Workflow Automation”.
It’s time to create your first workflow! Click on the “Add Custom Workflow” button located at the top right of the page. Type in the name and description of the workflow you have created and click “Save “.
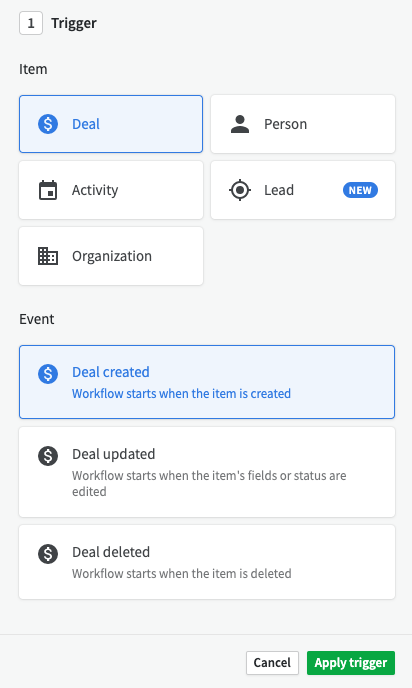
Start by clicking on the “Add trigger” button and select the element and event that triggers the automation. Once selected, finish by clicking on “Apply trigger”.
In the elements you can find: person, organization, prospect, deal and action.
Events can be: creation, update and deletion.
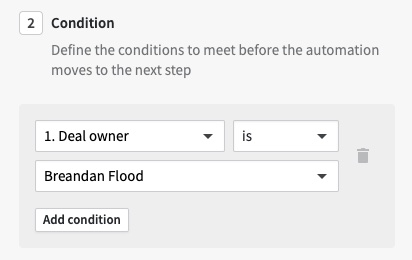
Now select the condition of your trigger. Conditions support you by defining the specific circumstances that trigger the automation you are creating.
Once you have defined the first condition you have the option to add a new condition or an action event by clicking on the “+” symbol.
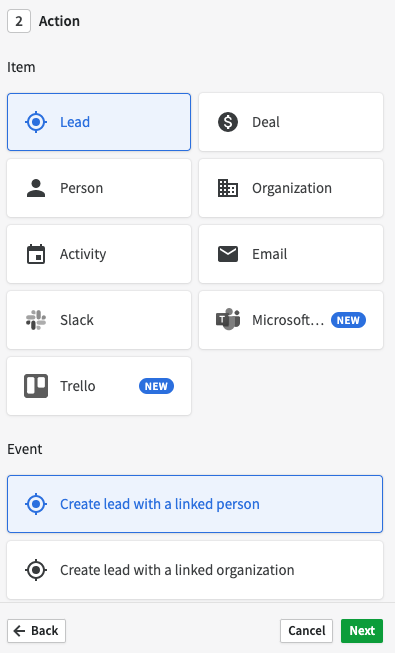
Now that you have defined the appropriate condition(s), it is time to define the action.
You can choose from six options: person, organization, prospect, deal, action and email or the two integrations that support your process.
Something very important to note is that you have the possibility of defining several actions to automate your workflow in descending order, however it should be noted that the automations do not wait until the condition is met, but are executed separately based on the initial action.
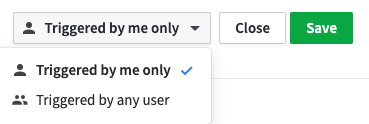
Once this step is completed , specify which users can activate your automation in the upper right part of the workflow.
That’s it! With your workflow designed you can close the automation by clicking the “Save” button.

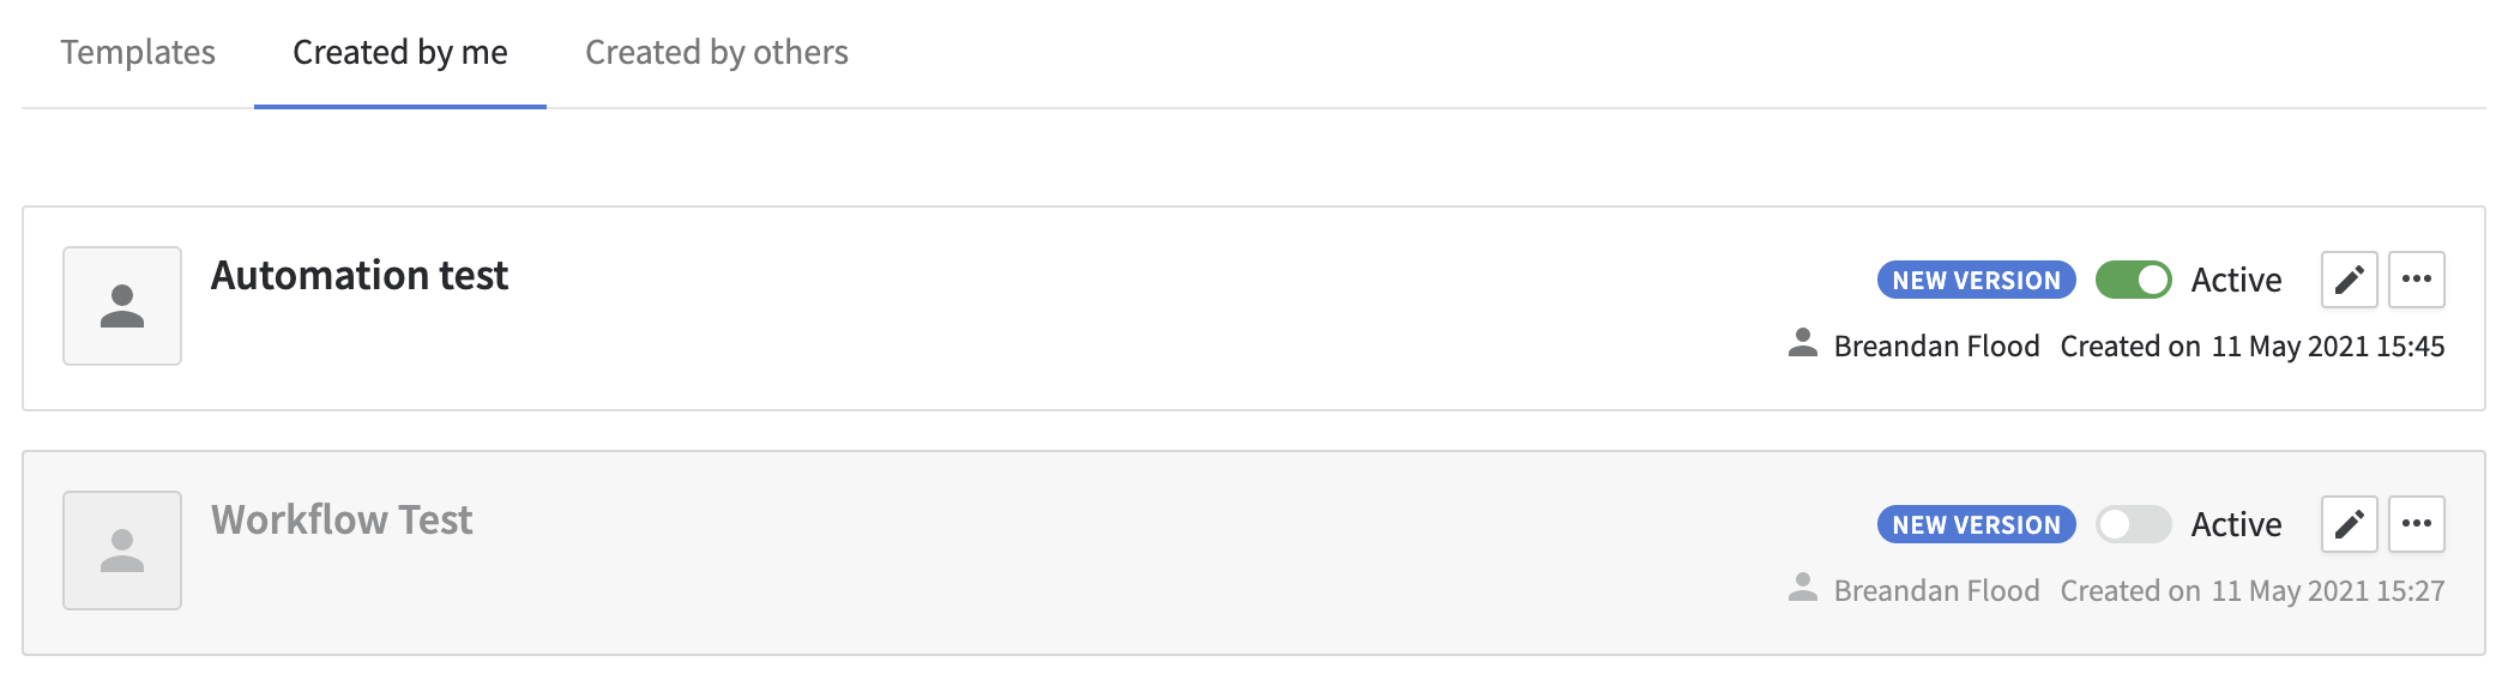
To visualize your workflows you must access the “Workflow Automation” page.
Here you can view all created workflows, edit them, delete them or mark them as active or inactive. It is important to note that before marking them as inactive, the activation and action functions do not work with this mark.
Some final considerations
- If your action event when automating is to send an email you should note that this action event will only use the address you have synced with your Pipedrive account via the Mail Sync feature.
- If the activations to create an action do not have a defined date, they will automatically take place on the same day as the action. If you want it to be scheduled at a different time, you must select the option corresponding to the time you want it to be triggered.
- If you have reached the limit of your open deals, the automations defined for a new deal will not be available.
- Importing data into your Pipedrive account does not trigger actions in workflow automations, regardless of whether they are associated with information in your account.
- It is important to note that if you have set up an automation that sends emails, they will be sent from the email of the user who created the automation. If you want them to be sent from your own email, you will need to set up your own automation.
Develop better workflows with Pipedrive now!
If you want to try Pipedrive 30 days free of chargeenter this promotional code when you create the account: pdp-vilarroig. And to create the account, follow this link. You can also contact us to help you in choosing or accelerating the use of Pipedrive if you are already using it.